Hello Everyone!
Happy New Year! It has been a little while since I have posted so, I'd like to update you on what I have been doing...
I have started quilting! I will begin to post about the stuff I have started to sew. I hope you all enjoy my new adventures!
Sunday, January 12, 2014
Monday, October 28, 2013
Minion Hats for Sale
Hi All,
I have posted my pattern for the minion hats on here for free but, I am also selling the finished product on my Etsy shop! Stop by if you're interested!
Happy Hooking!
I have posted my pattern for the minion hats on here for free but, I am also selling the finished product on my Etsy shop! Stop by if you're interested!
Happy Hooking!
Wednesday, October 9, 2013
Chicken Corn Chowder
I don't know about the rest of you but, I love being able to put rotisserie chicken in recipes. They are so easy (and usually cheaper than buying chicken breasts for the recipe). My grocery store has them normally priced at $7.99, which is high, but, on Friday they have a "chicken special" --YES there is a man that walks around in a chicken costume asking you if you've heard about their chicken special every single Friday. Instead of them being $7.99 they are $4.99 so, I gave into the man in the chicken costume and purchased a rotisserie chicken.
Now I have the dilemma of what should I do with my chicken. I come home and debone it almost immediately (I find this is easiest to do while they are still warm). I was thinking of making a nice chicken enchilada dish but, I was asked for Chicken Corn Chowder instead. So, here is my recipe. I hope you enjoy it as much as we do!
Ingredients:
1 red bell pepper, chopped
1 small onion, diced
1 jalapeno, diced
3 cloves garlic, minced
1/4 cup flour
1 box low-sodium chicken broth
1 bag frozen corn
1 rotisserie chicken, deboned and shredded
4 oz cream cheese, softened
1 cup milk
1 cup shredded cheddar cheese
3 chicken flavored bouillon cubes
1/2 tsp salt
1/2 tsp pepper
Directions:
- In large dutch oven, heat olive oil over medium heat. Saute the bell pepper, onion, jalapeno, and garlic until tender (about 5 minutes). In a bowl, whisk the broth and flour until there are no lumps left. Add the flour mixture to the dutch oven. Stir until consistent. Add the chicken and corn to the dutch oven, bring to a boil and let simmer for 10 minutes.
- In a bowl, melt your cream cheese in the microwave. Whisk together the milk and melted cream cheese until there are no lumps. Stir in the cream cheese mixture, bouillon cubes, salt and pepper, and cheddar cheese to the soup. Reduce heat and let simmer for another 20 minutes.
I like to serve this with a toasted baguette or a small toasted sandwich. ENJOY!
Crochet Minion Hats
Hi All,
I am currently working on a pattern for all sizes for those cute little minions from Despicable Me. Here is a preview of what they are going to look like:

Hope you check back soon!
I am currently working on a pattern for all sizes for those cute little minions from Despicable Me. Here is a preview of what they are going to look like:

Hope you check back soon!
Monday, October 7, 2013
Crochet Minnie Mouse Hat
Little kids say the darndest things, don't they? Well, my "niece" is in love with Minnie Mouse. She will bring the DVD to me and ask, "watch?" She's the cutest. Spending a week with her at the beach was an enormous amount of fun.

Materials:
5.0 mm hookLoops & Threads Impeccable in black and soft rose
Size:
Fits most 1-3 year olds. I made this hat for my cousin's 1.5 year old and she loves it!
Abbreviations:
magic ring: here is a tutorial for right handed crocheters
ch: chain
sl st: slip stitch
dc: double crochet
sc: single crochet
sc: single crochet
Hat:
Note: for all sl st at the end of the rounds, be sure to sl st them with your first dc and NOT your ch 2
using blackRnd 1: 10 dc in magic ring, sl st in first dc (10 sts)
Rnd 2: ch 2, 2 dc in the same st as you sl st, [2 dc] around, sl st in first dc (20 sts)
Rnd 3: ch 2, 2 dc in the same st as you sl st, dc in next st, [2 dc, dc] around, sl st in first dc (30 sts)
Rnd 4: ch 2, 2 dc in the same st as you sl st, dc in the next 2 sts, [2 dc, dc in next 2 sts] around, sl st in first dc (40 sts)
Rnd 5: ch 2, 2 dc in the same st as you sl st, dc in the next 3 sts, [2 dc, dc in next 3 sts] around, sl st in first dc (50 sts)
Rnd 6: ch 2, 2 dc in the same st as you sl st, dc in the next 4 sts, [2 dc, dc in next 4 sts] around, sl st in first dc (60 sts)
Rnd 7-14: ch 2, dc around, sl st in first dc (60 sts)
CHANGE COLORS... here is a good video tutorial on how to change colors for a round when crocheting
Rnd 15-17: ch 2, dc around, sl st in first dc (60 sts)
Rnd 18: sc around edges with the color of your choice (60 sts)
Row 1: hdc in second ch from hook, hdc across (18 sts)
Row 2-6: ch 1, hdc across (18 sts)
sc around the edges, F/O and weave in the edges
Rnd 1: 10 hdc in a magic ring, sl st in first hdc (10 sts)
Rnd 2: ch 1, 2 hdc around, sl st in first hdc (20 asts)
Rnd 3: ch 1, [2 hdc, hdc] around, sl st in first hdc (30 sts)
when you finish the third round on your third ear, continue to round four
Rnd 4: ch 1, sl st together with an ear that is already made for 24 sts (leaving 6 sts) leaving a foot of yarn for attaching to the hat
Rnd 18: sc around edges with the color of your choice (60 sts)
Bow:
ch 19Row 1: hdc in second ch from hook, hdc across (18 sts)
Row 2-6: ch 1, hdc across (18 sts)
sc around the edges, F/O and weave in the edges
Ears:
Make 4Rnd 1: 10 hdc in a magic ring, sl st in first hdc (10 sts)
Rnd 2: ch 1, 2 hdc around, sl st in first hdc (20 asts)
Rnd 3: ch 1, [2 hdc, hdc] around, sl st in first hdc (30 sts)
when you finish the third round on your third ear, continue to round four
Rnd 4: ch 1, sl st together with an ear that is already made for 24 sts (leaving 6 sts) leaving a foot of yarn for attaching to the hat
Assembly:
lay the hat flat, in the seam between the 3rd and 4th rounds, begin stitching the ears you made onto the hat
F/O and weave in ends
tie the pink yarn around the center of the bow piece that was made, wrap it around until it is the desired thickness, weave in the end, and attach to the first round of the hat
F/O and weave in ends
Hope you enjoy this pattern! Happy hooking!
Please note: Patterns are for personal and charity use only. If you enjoy the pattern, please link to it, but do not copy the pattern to your own website or blog.
Please note: Patterns are for personal and charity use only. If you enjoy the pattern, please link to it, but do not copy the pattern to your own website or blog.
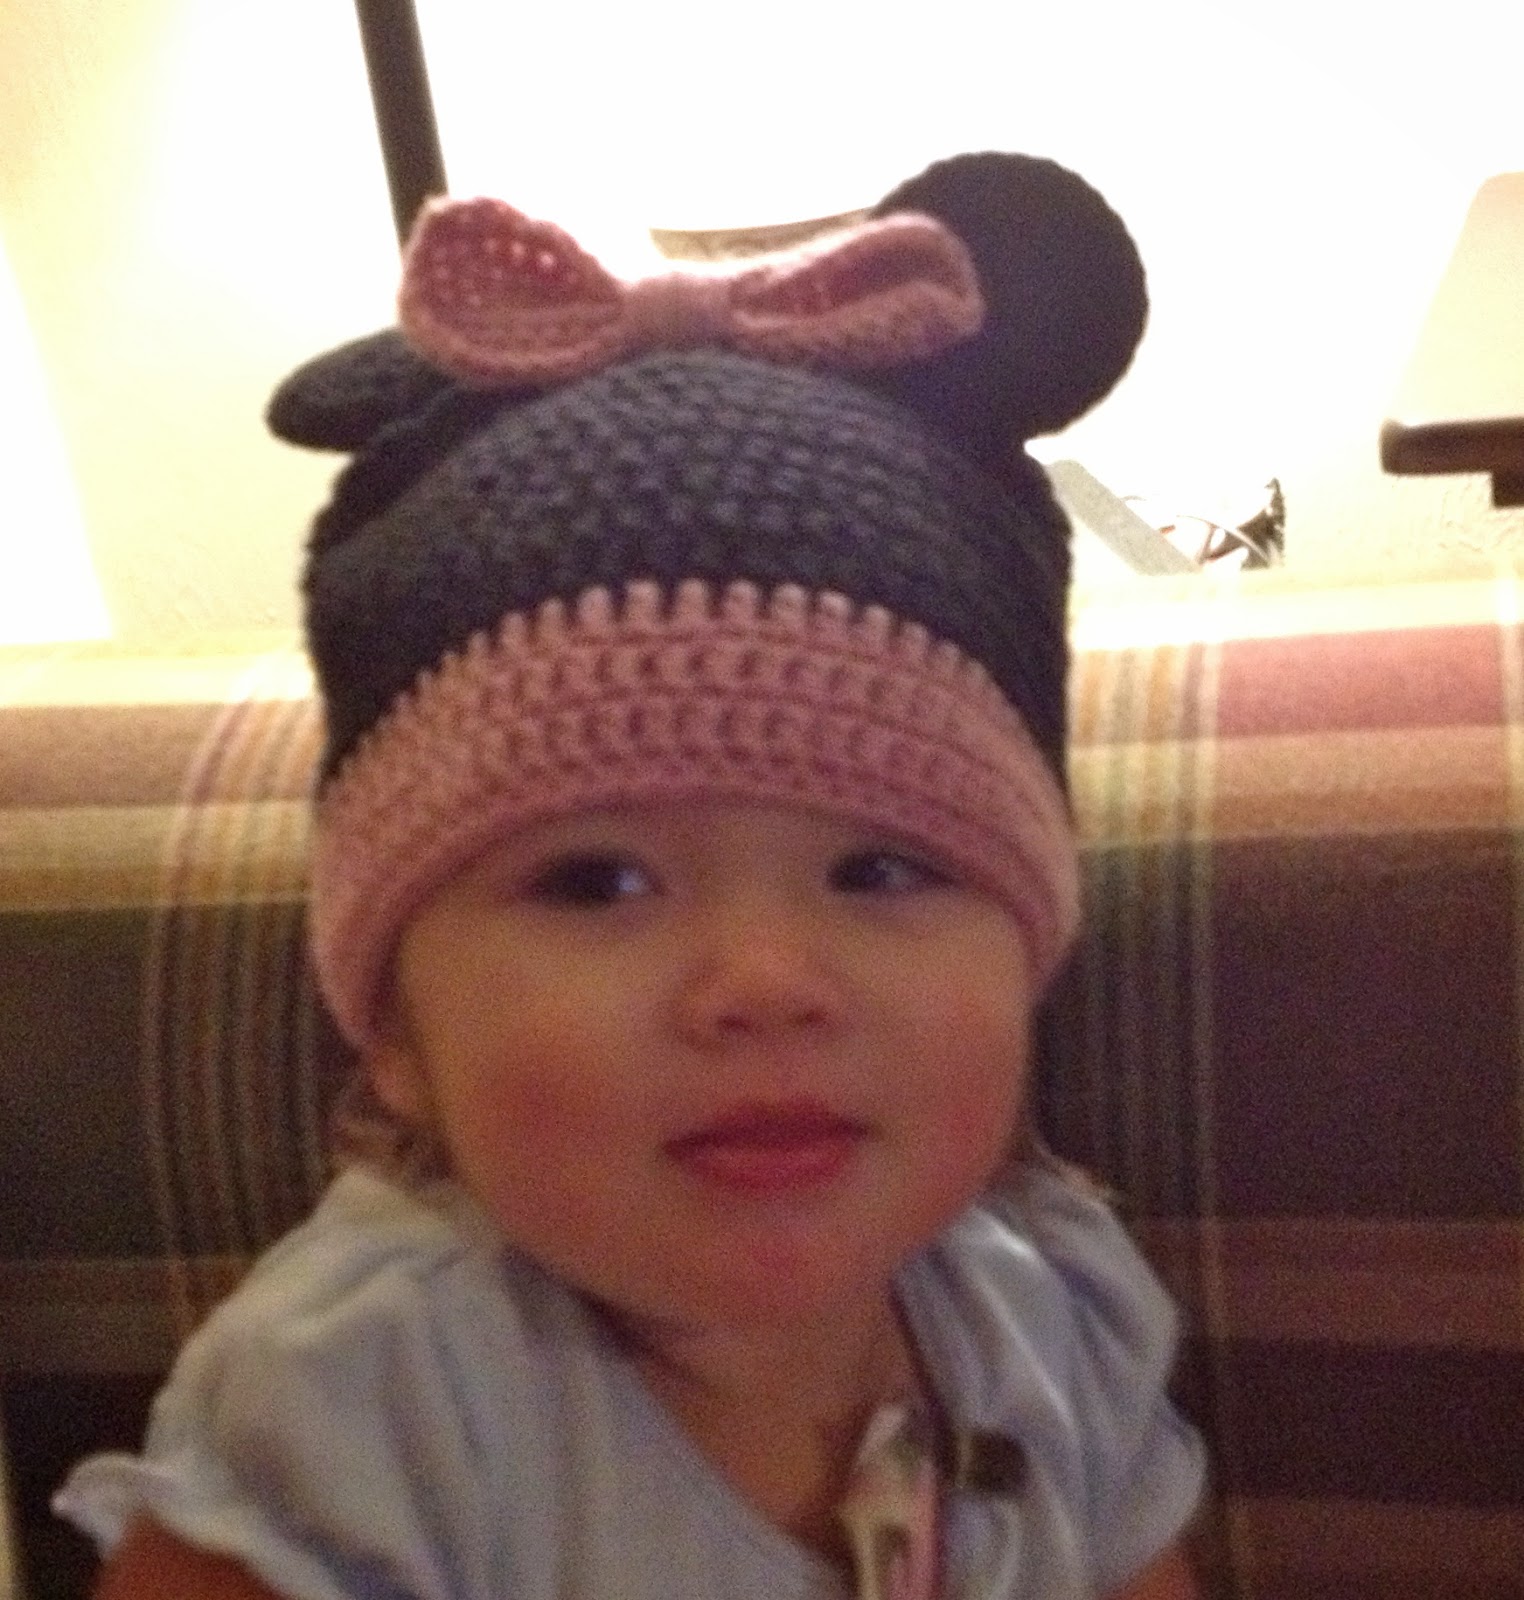 |
| Here's my little cutie pie! |
Friday, October 4, 2013
B-O-O Door Decor
I am constantly looking for ways to decorate my door for the holidays, despite my boyfriends best efforts to keep too many decorations out of our hall closet. Well, oops, looks like he keeps fighting a losing battle because, I am not giving up on decorations!
I recently came across a post that was selling a "BOO" ornament for my door... I wasn't spending $25 on it so, I decided I'd make one!

I bought all of my materials from AC Moore with a 40% off a single price item and an additional 15% off my entire purchase! How lucky!
rafia -- I'm not sure how much this would cost to be honest, my mom had some left over from Christmas last year and gave it to me, it's on Amazon for $3.84 a bundle
wooden letters - $3.99 a piece
So, lets do the math of what I spent:
My one 40% off item: $3.99 * (1.0 - 0.4) = $2.39
My total with the 15% discount = ($2.39 + $3.99 + $3.99) * 0.85 = $8.81
I recently came across a post that was selling a "BOO" ornament for my door... I wasn't spending $25 on it so, I decided I'd make one!

Materials:
rafia
2 wooden 'O' letters
1 wooden 'B' letter
Cost:
rafia -- I'm not sure how much this would cost to be honest, my mom had some left over from Christmas last year and gave it to me, it's on Amazon for $3.84 a bundle
wooden letters - $3.99 a piece
So, lets do the math of what I spent:
My one 40% off item: $3.99 * (1.0 - 0.4) = $2.39
My total with the 15% discount = ($2.39 + $3.99 + $3.99) * 0.85 = $8.81
So, who doesn't like saving $12?
Happy Halloween!
Tuesday, October 1, 2013
Cast Iron Skillet Handle Holder
So, you all know that I enjoy to cook but, I don't think I've mentioned my love for my cast iron skillets. They are perfect for searing fish and finishing it off in the oven, making a "steak house worthy" steak, blackened chicken (I will post my recipe soon), and so much more. The only problem with cast iron is how hot the handle gets (and how it smokes sometimes but, that's besides the point). My hot pads have seen better days, they get washed each time the towels need to be washed. I tend to get them a little dirty and this is unfortunate when they are in the washer and I want to use cast iron. Well, I had some 100% cotton yarn left over from making dishcloths last year for Christmas presents. So, last night, as I'm sitting on my couch with a hot pad on my back I started playing around with a skein of yellow. Well, The result was a cast iron skillet handle holder (that fits wonderfully). Here is what you need to do:


Materials:
4.00mm hook
100% cotton yarn (I used Sugar n' Cream in yellow) -- I have also used the Peaches and Creme brand
scissors
Abbreviations:
ch: chain
sc: single crochet
sl st: slip stitch
st: stitch
sts: stitches
st: stitch
sts: stitches
Gauge:
5 sc = 1 inch
totals 5 inches in length
Tutorial:
 |
| chain 6 |
 |
| single crochet 5 across |

 |
| insert your hook into the first stitch on the other side of your foundation chain |

 |
| single crochet across the back side of the foundation chain |
 |
| finished product without the reverse single crochet edging |
 |
| notice the additional real estate that the reverse single crochet round adds |
Directions:
ch 6
Round 1: in second st from hook, sc 5 across, sc 5 across on back side of foundation chain (10 sts) (here is a good video tutorial)
Round 2: 2 sc in first st, sc in next 3 sts, 2 sc in next 2 sts, sc in next 3 sts, 2 sc in next st (14 sts)
Round 3: 2 sc in first st, sc in next 5 sts, 2 sc in next 2 sts, sc in next 5 sts, 2 sc in next st (18 sts)
Rounds 4-5: sc around (18 sts)
Round 6: sc in next 4 sts, sc2tog, sc in next 7 sts, sc2tog, sc in next 3 sts (16 sts) (here is a good video tutorial of sc2tog)
Rounds 7-20: sc around (16 sts)
Round 21: sl st in next 2 sts, F/O and weave in ends
If you're interested in a more interesting edge, don't weave in the ends, instead, reverse sc around and then F/O and weave in ends.
Note: this will add some more length to the skillet holder.
Happy Hooking!
Please note: Patterns are for personal and charity use only. If you enjoy the pattern, please link to it, but do not copy the pattern to your own website or blog.
Subscribe to:
Posts (Atom)