Hi All,
I have posted my pattern for the minion hats on here for free but, I am also selling the finished product on my Etsy shop! Stop by if you're interested!
Happy Hooking!
Showing posts with label Crochet. Show all posts
Showing posts with label Crochet. Show all posts
Monday, October 28, 2013

Wednesday, October 9, 2013
Crochet Minion Hats
Hi All,
I am currently working on a pattern for all sizes for those cute little minions from Despicable Me. Here is a preview of what they are going to look like:

Hope you check back soon!
I am currently working on a pattern for all sizes for those cute little minions from Despicable Me. Here is a preview of what they are going to look like:

Hope you check back soon!
Monday, October 7, 2013
Crochet Minnie Mouse Hat
Little kids say the darndest things, don't they? Well, my "niece" is in love with Minnie Mouse. She will bring the DVD to me and ask, "watch?" She's the cutest. Spending a week with her at the beach was an enormous amount of fun.

Materials:
5.0 mm hookLoops & Threads Impeccable in black and soft rose
Size:
Fits most 1-3 year olds. I made this hat for my cousin's 1.5 year old and she loves it!
Abbreviations:
magic ring: here is a tutorial for right handed crocheters
ch: chain
sl st: slip stitch
dc: double crochet
sc: single crochet
sc: single crochet
Hat:
Note: for all sl st at the end of the rounds, be sure to sl st them with your first dc and NOT your ch 2
using blackRnd 1: 10 dc in magic ring, sl st in first dc (10 sts)
Rnd 2: ch 2, 2 dc in the same st as you sl st, [2 dc] around, sl st in first dc (20 sts)
Rnd 3: ch 2, 2 dc in the same st as you sl st, dc in next st, [2 dc, dc] around, sl st in first dc (30 sts)
Rnd 4: ch 2, 2 dc in the same st as you sl st, dc in the next 2 sts, [2 dc, dc in next 2 sts] around, sl st in first dc (40 sts)
Rnd 5: ch 2, 2 dc in the same st as you sl st, dc in the next 3 sts, [2 dc, dc in next 3 sts] around, sl st in first dc (50 sts)
Rnd 6: ch 2, 2 dc in the same st as you sl st, dc in the next 4 sts, [2 dc, dc in next 4 sts] around, sl st in first dc (60 sts)
Rnd 7-14: ch 2, dc around, sl st in first dc (60 sts)
CHANGE COLORS... here is a good video tutorial on how to change colors for a round when crocheting
Rnd 15-17: ch 2, dc around, sl st in first dc (60 sts)
Rnd 18: sc around edges with the color of your choice (60 sts)
Row 1: hdc in second ch from hook, hdc across (18 sts)
Row 2-6: ch 1, hdc across (18 sts)
sc around the edges, F/O and weave in the edges
Rnd 1: 10 hdc in a magic ring, sl st in first hdc (10 sts)
Rnd 2: ch 1, 2 hdc around, sl st in first hdc (20 asts)
Rnd 3: ch 1, [2 hdc, hdc] around, sl st in first hdc (30 sts)
when you finish the third round on your third ear, continue to round four
Rnd 4: ch 1, sl st together with an ear that is already made for 24 sts (leaving 6 sts) leaving a foot of yarn for attaching to the hat
Rnd 18: sc around edges with the color of your choice (60 sts)
Bow:
ch 19Row 1: hdc in second ch from hook, hdc across (18 sts)
Row 2-6: ch 1, hdc across (18 sts)
sc around the edges, F/O and weave in the edges
Ears:
Make 4Rnd 1: 10 hdc in a magic ring, sl st in first hdc (10 sts)
Rnd 2: ch 1, 2 hdc around, sl st in first hdc (20 asts)
Rnd 3: ch 1, [2 hdc, hdc] around, sl st in first hdc (30 sts)
when you finish the third round on your third ear, continue to round four
Rnd 4: ch 1, sl st together with an ear that is already made for 24 sts (leaving 6 sts) leaving a foot of yarn for attaching to the hat
Assembly:
lay the hat flat, in the seam between the 3rd and 4th rounds, begin stitching the ears you made onto the hat
F/O and weave in ends
tie the pink yarn around the center of the bow piece that was made, wrap it around until it is the desired thickness, weave in the end, and attach to the first round of the hat
F/O and weave in ends
Hope you enjoy this pattern! Happy hooking!
Please note: Patterns are for personal and charity use only. If you enjoy the pattern, please link to it, but do not copy the pattern to your own website or blog.
Please note: Patterns are for personal and charity use only. If you enjoy the pattern, please link to it, but do not copy the pattern to your own website or blog.
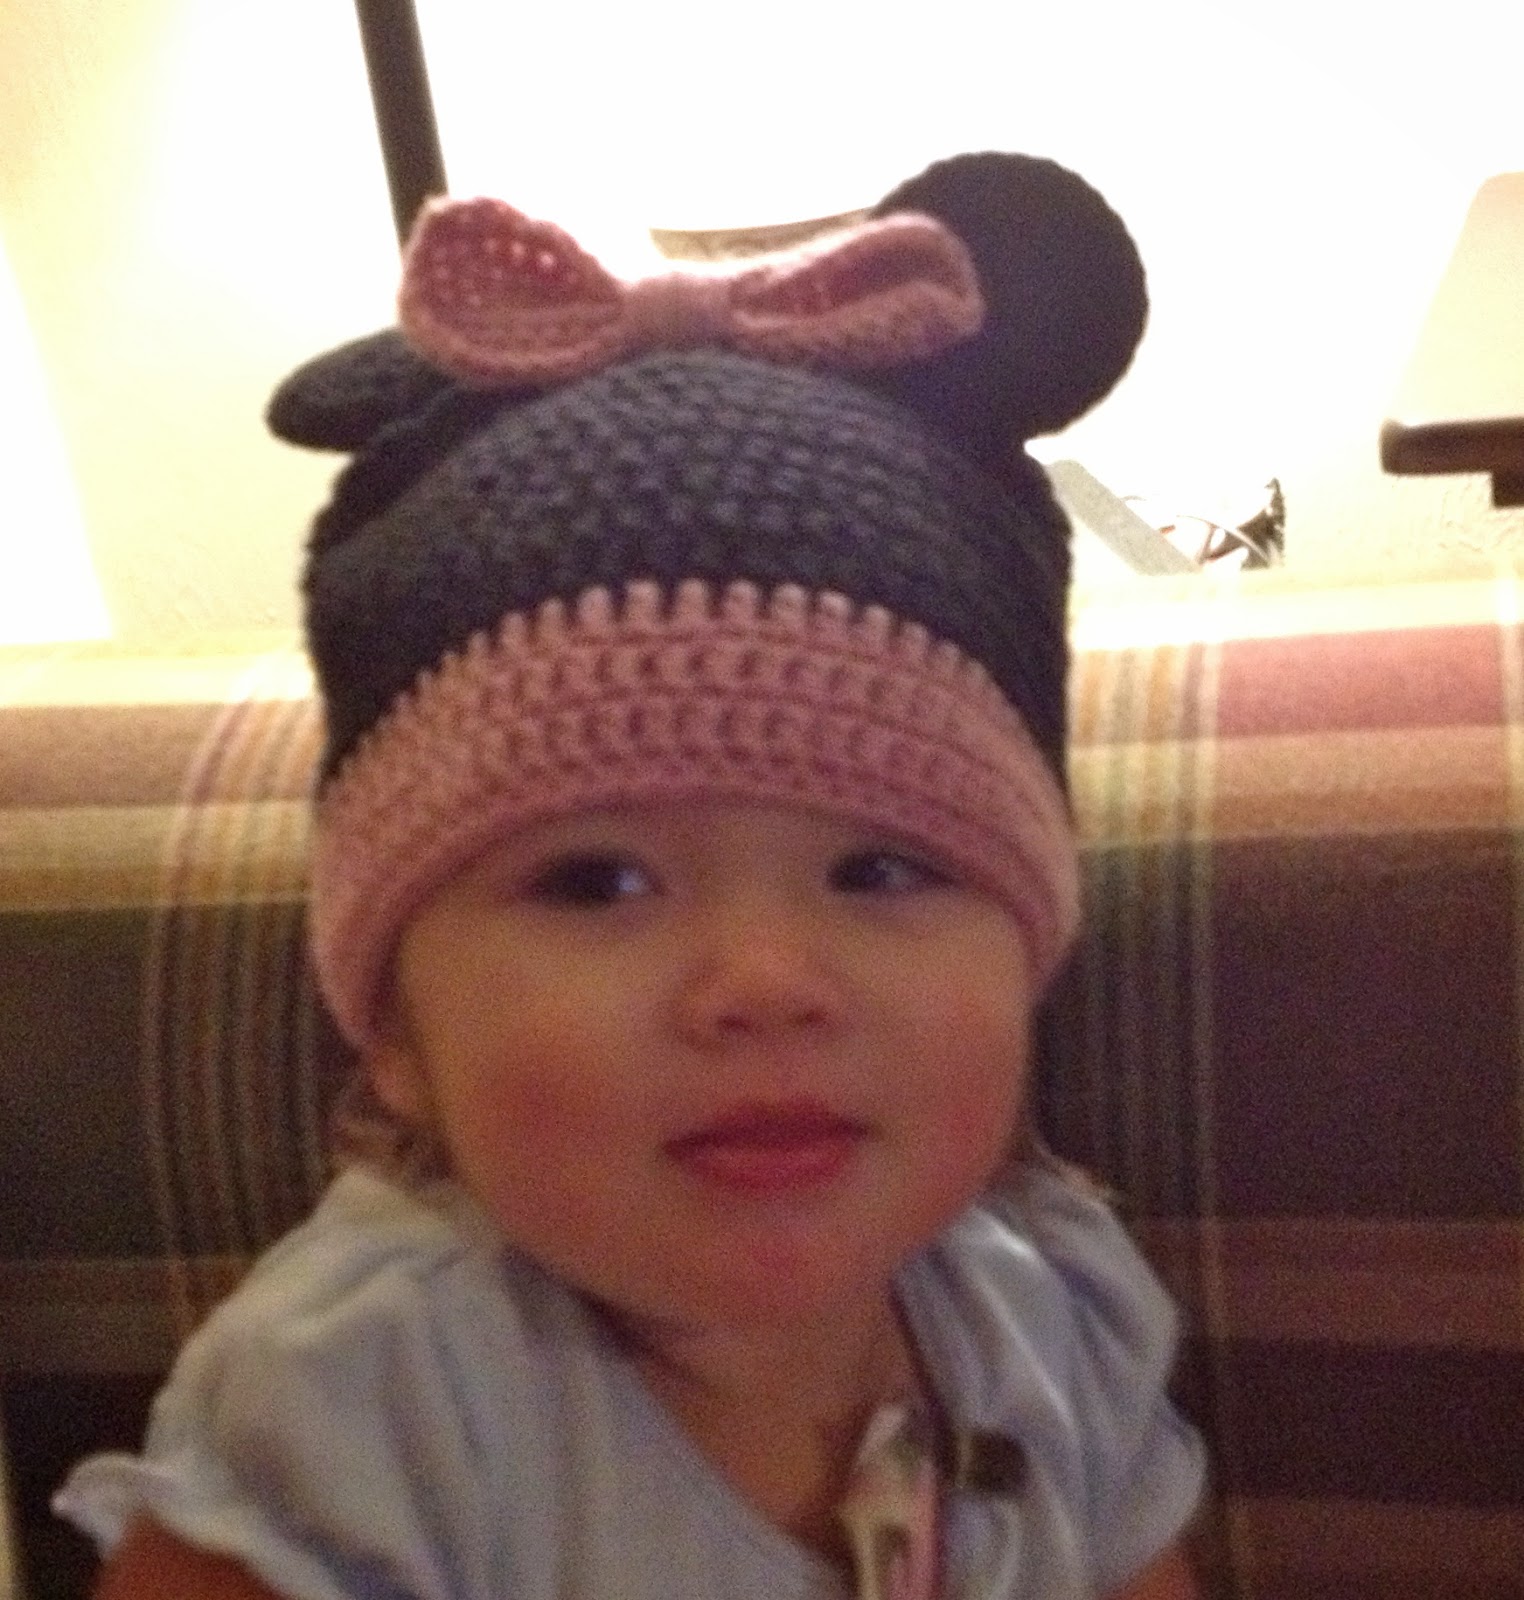 |
| Here's my little cutie pie! |
Tuesday, October 1, 2013
Cast Iron Skillet Handle Holder
So, you all know that I enjoy to cook but, I don't think I've mentioned my love for my cast iron skillets. They are perfect for searing fish and finishing it off in the oven, making a "steak house worthy" steak, blackened chicken (I will post my recipe soon), and so much more. The only problem with cast iron is how hot the handle gets (and how it smokes sometimes but, that's besides the point). My hot pads have seen better days, they get washed each time the towels need to be washed. I tend to get them a little dirty and this is unfortunate when they are in the washer and I want to use cast iron. Well, I had some 100% cotton yarn left over from making dishcloths last year for Christmas presents. So, last night, as I'm sitting on my couch with a hot pad on my back I started playing around with a skein of yellow. Well, The result was a cast iron skillet handle holder (that fits wonderfully). Here is what you need to do:


Materials:
4.00mm hook
100% cotton yarn (I used Sugar n' Cream in yellow) -- I have also used the Peaches and Creme brand
scissors
Abbreviations:
ch: chain
sc: single crochet
sl st: slip stitch
st: stitch
sts: stitches
st: stitch
sts: stitches
Gauge:
5 sc = 1 inch
totals 5 inches in length
Tutorial:
 |
| chain 6 |
 |
| single crochet 5 across |

 |
| insert your hook into the first stitch on the other side of your foundation chain |

 |
| single crochet across the back side of the foundation chain |
 |
| finished product without the reverse single crochet edging |
 |
| notice the additional real estate that the reverse single crochet round adds |
Directions:
ch 6
Round 1: in second st from hook, sc 5 across, sc 5 across on back side of foundation chain (10 sts) (here is a good video tutorial)
Round 2: 2 sc in first st, sc in next 3 sts, 2 sc in next 2 sts, sc in next 3 sts, 2 sc in next st (14 sts)
Round 3: 2 sc in first st, sc in next 5 sts, 2 sc in next 2 sts, sc in next 5 sts, 2 sc in next st (18 sts)
Rounds 4-5: sc around (18 sts)
Round 6: sc in next 4 sts, sc2tog, sc in next 7 sts, sc2tog, sc in next 3 sts (16 sts) (here is a good video tutorial of sc2tog)
Rounds 7-20: sc around (16 sts)
Round 21: sl st in next 2 sts, F/O and weave in ends
If you're interested in a more interesting edge, don't weave in the ends, instead, reverse sc around and then F/O and weave in ends.
Note: this will add some more length to the skillet holder.
Happy Hooking!
Please note: Patterns are for personal and charity use only. If you enjoy the pattern, please link to it, but do not copy the pattern to your own website or blog.
If you're interested in a more interesting edge, don't weave in the ends, instead, reverse sc around and then F/O and weave in ends.
Note: this will add some more length to the skillet holder.
Happy Hooking!
Please note: Patterns are for personal and charity use only. If you enjoy the pattern, please link to it, but do not copy the pattern to your own website or blog.
Wednesday, September 25, 2013
Newborn/3M Crochet Football Cocoon
There's a new virus going around... Babies, babies, babies... HOW EXCITING! It seems like everyone of my friends are either getting engaged or getting pregnant. Well, lucky me! I found out that my college roommate is expecting! Her husband is a Green Bay Packer so, of course, I need to make something football themed.
Since I started crocheting, I have been wanting to make a cocoon for a newborn and I came across this pattern on Etsy. Too bad it is for knitting or I would buy it... done deal! Right? Too bad I crochet... But, luckily enough, the posting tells me that the yarn used is super bulky, and I've made hats before...

I can come up with a pattern that replicates this posting? Well, I gave it a shot. Here is what I've come up with!
2 skeins Bernat Softee Chunky yarn in dark taupe

Since I started crocheting, I have been wanting to make a cocoon for a newborn and I came across this pattern on Etsy. Too bad it is for knitting or I would buy it... done deal! Right? Too bad I crochet... But, luckily enough, the posting tells me that the yarn used is super bulky, and I've made hats before...
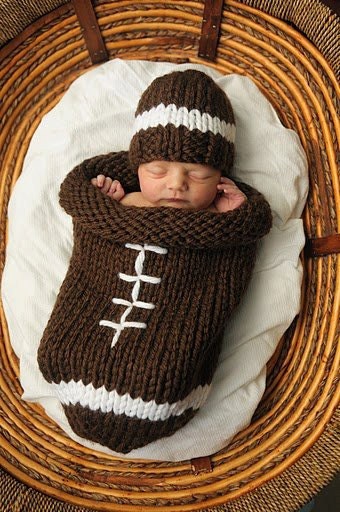
I can come up with a pattern that replicates this posting? Well, I gave it a shot. Here is what I've come up with!
Materials:
6.50 mm hook2 skeins Bernat Softee Chunky yarn in dark taupe

1 skein (I didn't use all of it) Bernat Softee Chunky yarn in white
18 inches long (unrolled) - 17-17.5 inches rolled
Round 2: ch 1, 2 sc in same st as you sl st, 2 sc around, sl st in first sc (14 sts)
Round 3: ch 1, 2 sc in same st as you sl st, sc in next st, [2 sc, sc] around, sl st in first sc (21 sts)
Round 4: ch 1, 2 sc in same st as you sl st, sc in next 2 sts, [2 sc, sc in next 2 sts] around, sl st in first sc (28 sts)
Round 5: ch 1, 2 sc in same st as you sl st, sc in next 3 sts, [2 sc, sc in next 3 sts] around, sl st in first sc (35 sts)
Round 6-7: ch 1, sc in same st as you sl st, sc around, sl st in first sc (35 sts)
Round 8: ch 1, sc in same st as you sl st, sc around, (changing yarn to white) sl st in first sc (35 sts)
Round 9: (using white yarn) ch 1, sc in same st as you sl st, sc around, sl st in first sc (35 sts)
Round 10: ch 1, sc in same st as you sl st, sc around, sl st in first sc (35 sts)
Gauge:
9 sc = 3 inches
Size:
Hat
14 inches in circumference
6 inches from top of hat to bottom (crown to bottom of ear)
Cocoon
21 inches in circumference18 inches long (unrolled) - 17-17.5 inches rolled
Directions:
Hat
using dark taupe (brown) yarn
Round 1: in magic ring, sc 7, sl st in first sc (7 sts)Round 2: ch 1, 2 sc in same st as you sl st, 2 sc around, sl st in first sc (14 sts)
Round 3: ch 1, 2 sc in same st as you sl st, sc in next st, [2 sc, sc] around, sl st in first sc (21 sts)
Round 4: ch 1, 2 sc in same st as you sl st, sc in next 2 sts, [2 sc, sc in next 2 sts] around, sl st in first sc (28 sts)
Round 5: ch 1, 2 sc in same st as you sl st, sc in next 3 sts, [2 sc, sc in next 3 sts] around, sl st in first sc (35 sts)
Round 6-7: ch 1, sc in same st as you sl st, sc around, sl st in first sc (35 sts)
Round 8: ch 1, sc in same st as you sl st, sc around, (changing yarn to white) sl st in first sc (35 sts)
Round 9: (using white yarn) ch 1, sc in same st as you sl st, sc around, sl st in first sc (35 sts)
Round 10: ch 1, sc in same st as you sl st, sc around, sl st in first sc (35 sts)
Round 11: ch 1, sc in same st as you sl st, sc around, (changing yarn to dark taupe) sl st in first sc (35 sts)
Round 12-14: (using dark taupe) ch 1, sc in same st as you sl st, sc around, sl st in first sc (35 sts)
F/O and weave in ends
Cocoon
using the dark taupe (brown)
Round 1: in magic ring, sc 7, sl st in first sc (7 sts)
Round 2: ch 1, 2 sc in same st as you sl st, 2 sc around, sl st in first sc (14 sts)
 Round 3: ch 1, 2 sc in same st as you sl st, sc in next st, [2 sc, sc] around, sl st in first sc (21 sts)
Round 4: ch 1, 2 sc in same st as you sl st, sc in next 2 sts, [2 sc, sc in next 2 sts] around, sl st in first sc (28 sts)
Round 5: ch 1, 2 sc in same st as you sl st, sc in next 3 sts, [2 sc, sc in next 3 sts] around, sl st in first sc (35 sts)
Round 6: ch 1, 2 sc in same st as you sl st, sc in next 4 sts, [2 sc, sc in next 4 sts] around, sl st in first sc (42 sts)
Round 7: ch 1, 2 sc in same st as you sl st, sc in next 5 sts, [2 sc, sc in next 5 sts] around, sl st in first sc (49 sts)
Round 8: ch 1, 2 sc in same st as you sl st, sc in next 6 sts, [2 sc, sc in next 6 sts] around, (changing yarn to white) sl st in first sc (56 sts)
Round 9: (using white) ch 1, sc in same st as you sl st, sc around, sl st in first sc (56 sts)
Round 10: ch 1, sc in same st as you sl st, sc around, (changing yarn to dark taupe) sl st in first sc (56 sts)F/O and weave in ends
Cocoon
using the dark taupe (brown)
Round 1: in magic ring, sc 7, sl st in first sc (7 sts)
Round 2: ch 1, 2 sc in same st as you sl st, 2 sc around, sl st in first sc (14 sts)
 Round 3: ch 1, 2 sc in same st as you sl st, sc in next st, [2 sc, sc] around, sl st in first sc (21 sts)
Round 4: ch 1, 2 sc in same st as you sl st, sc in next 2 sts, [2 sc, sc in next 2 sts] around, sl st in first sc (28 sts)
Round 5: ch 1, 2 sc in same st as you sl st, sc in next 3 sts, [2 sc, sc in next 3 sts] around, sl st in first sc (35 sts)
Round 6: ch 1, 2 sc in same st as you sl st, sc in next 4 sts, [2 sc, sc in next 4 sts] around, sl st in first sc (42 sts)
Round 7: ch 1, 2 sc in same st as you sl st, sc in next 5 sts, [2 sc, sc in next 5 sts] around, sl st in first sc (49 sts)
Round 8: ch 1, 2 sc in same st as you sl st, sc in next 6 sts, [2 sc, sc in next 6 sts] around, (changing yarn to white) sl st in first sc (56 sts)
Round 9: (using white) ch 1, sc in same st as you sl st, sc around, sl st in first sc (56 sts)
Round 11-49 (or 50, depends on how long your cocoon is): (using dark taupe) ch 1, sc in same st as you sl st, sc around, sl st in first sc (56 sts)
F/O and weave in ends
Laces
using the white
surface stitch (here is a great tutorial on how to surface stitch)
Main Lace:
I started surface stitching 8 rounds from the white stripe and I surface stitched 21 times, turned and went down the other side of the row
To connect the surface stitches, I took a 5.00 mm hook and pulled the white yarn (making a zigzag pattern) back and forth between the two rows of surface stitches using the inside of each surface stitch
I inserted my hook and pulled the yarn over the stitch and out from underneath
Small Laces:
I did the same concept as the main lace but I spaced them by leaving 2 sts on each end and 4 sts in between each small lace.
If you have any questions, feel free to leave me a comment!
Happy Hooking!
Please note: Patterns are for personal and charity use only. If you enjoy the pattern, please link to it, but do not copy the pattern to your own website or blog.
Laces
using the white
surface stitch (here is a great tutorial on how to surface stitch)
Main Lace:
I started surface stitching 8 rounds from the white stripe and I surface stitched 21 times, turned and went down the other side of the row
To connect the surface stitches, I took a 5.00 mm hook and pulled the white yarn (making a zigzag pattern) back and forth between the two rows of surface stitches using the inside of each surface stitch
I inserted my hook and pulled the yarn over the stitch and out from underneath
Small Laces:
I did the same concept as the main lace but I spaced them by leaving 2 sts on each end and 4 sts in between each small lace.
If you have any questions, feel free to leave me a comment!
Happy Hooking!
Please note: Patterns are for personal and charity use only. If you enjoy the pattern, please link to it, but do not copy the pattern to your own website or blog.
Sunday, May 5, 2013
Hooded Infinity Scarf
My boyfriend's mother (who I made the Eagles Head Warmer for) cannot wear things tight on her head. She was asking me if I could make her a hat that would be comfortable for her. I had found a hat/scarf combo a while ago that I thought would look great. Lucky me, she loved the pictures of it.
Well, I start making this hooded scarf and the pattern and something just wasn't looking right. When I started the scarf... chaining 130 wasn't quite right and when I finished round 8, it wasn't the correct gauge. So, I continued making more rounds (10 total). Then, when I started making the hood, I stopped after the initial chain 60 (because it was not long enough to go around my head like a hood should). I thought this was weird since both of us are using Red Heart yarn but, ohh well I guess.
This is when I decided... I like how the pattern I found had the custom back loops and front loops so, I am changing the measurements and round counts.
Materials:
 Red Heart Super Saver yarn in Aran Flecks (I used one 5 oz skein plus some that I had left over--approx 6 to 7 oz)
Size K crochet hook (6.50mm)
Scissors
Yarn needle
NOTE: the yarn is slightly scratchy, so I softened it. Directions on softening yarn can be found here.
Gauge:
12 sts = 4 in
Scarf:
Hood: 20 1/2 in x 9 1/2 in
Abbreviations:
ch: chain
sts: stitches
hdc: half double crochet
FL: front loop
BL: back loop
sl st: slip stitch
Scarf:
ch 165, sl st in first st (make sure that your chain is not twisted)
Round 1: ch 2, hdc in the same st as sl st, hdc around (165 sts)
Round 2-12: ch 2, turn, hdc FL in the same st as sl st, hdc BL, [hdc FL, hdc BL] around, sl st in first st (165 sts)
--This is meant to be wrapped around your neck once. If you want a cowl, ch 80 and follow the pattern, ending in 80 sts for each round.
Hood:
ch 76
Row 1: In second ch from hook, [hdc CFL, hdc CBL] around (75 sts)
Row 2-24: ch 2, turn, [hdc FL, hdc BL]
F/O and weave in ends
Fold the hood rectangle in half, whip stitch (or slip stitch) the initial chain together, starting from the end that will be attached to the scarf. (Note: to make the hood lay on your head better, once you get ___ inches up the ) Line up the seam of the hood with the seam of the scarf; whip stitch the hood to the scarf.
Please note: Patterns are for personal and charity use only. If you enjoy the pattern, please link to it, but do not copy the pattern to your own website or blog.
Well, I start making this hooded scarf and the pattern and something just wasn't looking right. When I started the scarf... chaining 130 wasn't quite right and when I finished round 8, it wasn't the correct gauge. So, I continued making more rounds (10 total). Then, when I started making the hood, I stopped after the initial chain 60 (because it was not long enough to go around my head like a hood should). I thought this was weird since both of us are using Red Heart yarn but, ohh well I guess.
This is when I decided... I like how the pattern I found had the custom back loops and front loops so, I am changing the measurements and round counts.
Materials:
 Red Heart Super Saver yarn in Aran Flecks (I used one 5 oz skein plus some that I had left over--approx 6 to 7 oz)
Size K crochet hook (6.50mm)
Scissors
Yarn needle
NOTE: the yarn is slightly scratchy, so I softened it. Directions on softening yarn can be found here.
Gauge:
12 sts = 4 in
Scarf:
Hood: 20 1/2 in x 9 1/2 in
Abbreviations:
ch: chain
sts: stitches
hdc: half double crochet
FL: front loop
BL: back loop
sl st: slip stitch
Scarf:
ch 165, sl st in first st (make sure that your chain is not twisted)
Round 1: ch 2, hdc in the same st as sl st, hdc around (165 sts)
Round 2-12: ch 2, turn, hdc FL in the same st as sl st, hdc BL, [hdc FL, hdc BL] around, sl st in first st (165 sts)
--This is meant to be wrapped around your neck once. If you want a cowl, ch 80 and follow the pattern, ending in 80 sts for each round.
Hood:
ch 76
Row 1: In second ch from hook, [hdc CFL, hdc CBL] around (75 sts)
Row 2-24: ch 2, turn, [hdc FL, hdc BL]
F/O and weave in ends
Fold the hood rectangle in half, whip stitch (or slip stitch) the initial chain together, starting from the end that will be attached to the scarf. (Note: to make the hood lay on your head better, once you get ___ inches up the ) Line up the seam of the hood with the seam of the scarf; whip stitch the hood to the scarf.
Thursday, February 14, 2013
Crochet Small Basket with Handles
My friend recently moved to the area and of course (if you have read a previous post) I made her a gift basket, literally. I hadn't even considered crocheting a basket so, this has to be fun, right? I didn't even have to go looking for the pattern... I already had the pattern pinned on my pinterest page! I saw these baskets and fell in love with them.

The basket shown is the smallest size for the pattern I found. So, the pattern I followed--with modifications, or course-- is the one I found here.


The basket shown is the smallest size for the pattern I found. So, the pattern I followed--with modifications, or course-- is the one I found here.

Modifications include:
- Instead of holding 2 skeins of super thick and chunky yarn together, I held 4 strands of worsted weight yarn together. I ended up using Red Heart Super Saver yarn in Aran Flecks. The pattern took a little less than 2 skeins of yarn.
- I extended the base of the pattern by one round. So, after Round 6, I continued to increase so my final stitch count was 56 instead of 48. (Message me if you have a question about this)
- For the handles (Round 14-15 in the pattern):
- Rnd 14: Ch 2, hdc in next 9 sts, ch 12, skip the next 10 sts, hdc in next 18 sts, ch 12, skip the next 10 sts, hdc in the next 9 sts, join with sl st
- Rnd 15: Ch1, sc in the same st and in the next 9 sts, work 15 sc under the ch 12 space (do not work into the stitches, instead when you would go into them, go under them instead), sc in the next 18 sts, work 15 sc under the ch 12 space, sc in the next 9 sts, join with sl st, F/O and weave in ends

This basket makes a great gift. I might make one for my boyfriend as an Easter basket this year.
ENJOY!
Thursday, February 7, 2013
Wrap Around Baby Booties
So, I don't know about everyone else but, I am at the age where my friends are starting to have babies (crazy, I know, but they are mostly older than me). So, of course, I want to make them something cute to start off their young ones lives.
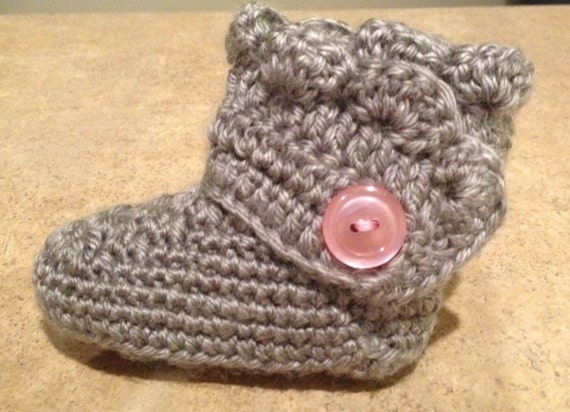
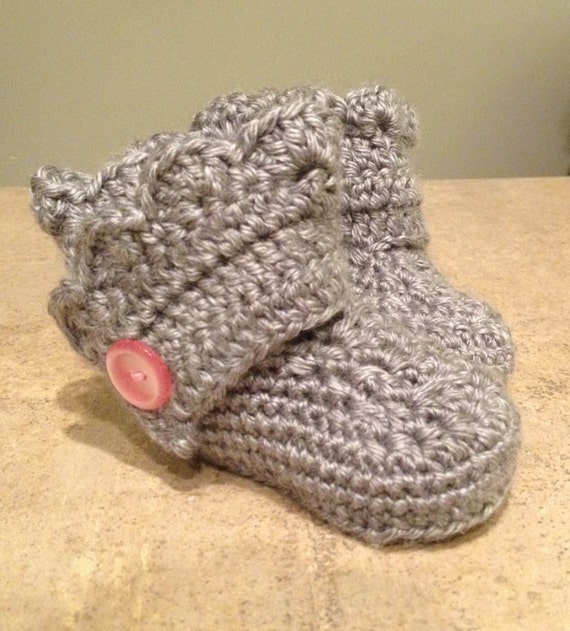
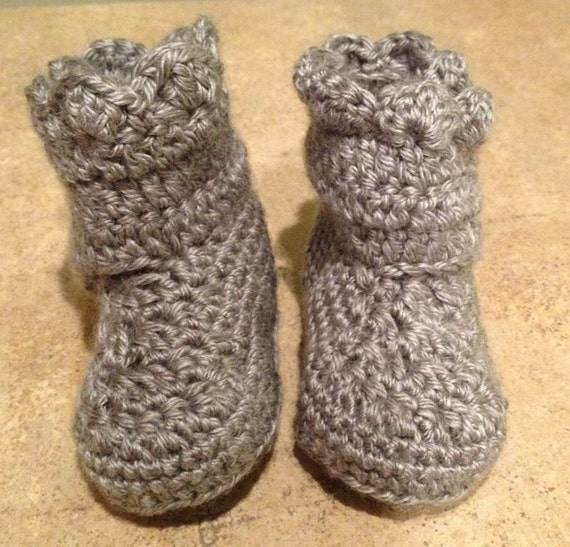
I have made baby booties in the past so, why not try another pair... right? During my search, I found these gems... Aren't they absolutely ADORABLE?????


ch 11
Rnd 1: sc in 2nd ch, sc 3 times, hdc 3 times, hdc 7 times in last ch, (other side of initial chain), hdc 3 times, sc 3 times, sc 4 times in last ch, sl st in first sc (24)
Rnd 2: ch 1, sc in same sc, sc 5 times, hdc, 2hdc 3 times, 3hdc, 2hdc 3 times, hdc, sc 6 times, 2sc 3 times, sl st in first sc (35)
Boot
Rnd 1: ch 1, (working in black loops for the entire round) sc around (35) --if you sc in the same sc at the beginning, your seam will be nicer looking
Rnd 2-3: ch 1, sc around (35) --if you sc in the same sc at the beginning, your seam will be nicer looking
Rnd 4: ch 1, sc in the same sc, sc 7 times, sc2tog, dc2tog, dc, dc3tog, dc, dc2tog, sc2tog, sc around, sl st (29)
Rnd 5: ch 1, sc in the same sc, sc 5 times, sc2tog, dc2tog, dc3tog, dc2tog, sc2tog, sc around, sl st (23)
Rnd 6: ch 1, sc in the same sc, sc 3 times, dc, dc3tog, dc, sc2tog, sc around, sl st (19)
F/O weave in ends.
Boot Cuff
for the right boot, sl st in the 4th st from the seam
for the left boot, sl st in the 8th st from the seam
(there will be 3 sts in the front of the boot--dc, dc3tog, dc)
ch 15
Rnd 1: hdc in 3rd ch from hook -first 2 ch counts as first hdc, hdc in next 11 ch, hdc in first sc (the one you sl st in), hdc 16 times (there will be 3 spaces left), skip 3 spaces, sc in last space.
Please note: Patterns are for personal and charity use only. If you enjoy the pattern, please link to it, but do not copy the pattern to your own website or blog.
I have made baby booties in the past so, why not try another pair... right? During my search, I found these gems... Aren't they absolutely ADORABLE?????

They don't look too hard to make so, I searched in google for "crochet baby wrap around boots pattern" and lucky me, I found this pattern from I'm Topsy Turvy
I have made three pairs of the booties following the pattern on the blog, two for friends having babies and a work friend ordered a pair from me!
Then, I had a request from the same work friend. Her daughter received an American Girl Doll for Christmas this year (so exciting, I had one as young girl) and she was wondering if I could make one to fit the doll. So nice of her to want to surprise her daughter with something special!
First I had to find out the size of the doll's feet (2-5/8" x 1-3/8") and then I started experimenting with the pattern. Here is what I went off of:
Materials:
4.00mm crochet hook
Caron Simply Soft yarn in Grey Heather
2 pink buttons
Abbreviations:
ch: chain
sc: single crochet
hdc: half double crochet:
sc2tog: single crochet 2 together
dc2tog: double crochet 2 together
dc3tog: double crochet 3 together
sl st: slip stitch
Directions:
Solech 11
Rnd 1: sc in 2nd ch, sc 3 times, hdc 3 times, hdc 7 times in last ch, (other side of initial chain), hdc 3 times, sc 3 times, sc 4 times in last ch, sl st in first sc (24)
Rnd 2: ch 1, sc in same sc, sc 5 times, hdc, 2hdc 3 times, 3hdc, 2hdc 3 times, hdc, sc 6 times, 2sc 3 times, sl st in first sc (35)
Boot
Rnd 1: ch 1, (working in black loops for the entire round) sc around (35) --if you sc in the same sc at the beginning, your seam will be nicer looking
Rnd 2-3: ch 1, sc around (35) --if you sc in the same sc at the beginning, your seam will be nicer looking
Rnd 4: ch 1, sc in the same sc, sc 7 times, sc2tog, dc2tog, dc, dc3tog, dc, dc2tog, sc2tog, sc around, sl st (29)
Rnd 5: ch 1, sc in the same sc, sc 5 times, sc2tog, dc2tog, dc3tog, dc2tog, sc2tog, sc around, sl st (23)
Rnd 6: ch 1, sc in the same sc, sc 3 times, dc, dc3tog, dc, sc2tog, sc around, sl st (19)
F/O weave in ends.
Boot Cuff
for the right boot, sl st in the 4th st from the seam
for the left boot, sl st in the 8th st from the seam
(there will be 3 sts in the front of the boot--dc, dc3tog, dc)
ch 15
Rnd 1: hdc in 3rd ch from hook -first 2 ch counts as first hdc, hdc in next 11 ch, hdc in first sc (the one you sl st in), hdc 16 times (there will be 3 spaces left), skip 3 spaces, sc in last space.
Rnd 2: ch 2 (counts as hdc), turn, hdc in first hdc, hdc around, (when there are 4 sts left) ch 1 skip one hdc, hdc in last 3 sts
Rnd 3: ch 2 (counts as hdc), turn, hdc in the 3 hdc, hdc in ch1 space, hdc around
Rnd 4 scallops: turn, 5dc in second dc, [skip 1 hdc, sc in next hdc, skip 1 hdc, 5dc in next hdc], repeat around (10 shells), sc down the side (I do 2 for each row so a total of 6 down the side), continuing around sc across the bottom along the original chain, sl st, F/O and weave in ends
I hope someone else can get use out of this pattern modification for another doll! Pictures of the doll boots to come!
ENJOY!
Please note: Patterns are for personal and charity use only. If you enjoy the pattern, please link to it, but do not copy the pattern to your own website or blog.
Tuesday, January 29, 2013
Etsy Shop
Hey Guys! I recently made an etsy.com account and plan on selling some things I am making. It is called Emily's Hook Creations, please take a look!
Monday, January 28, 2013
Crochet Frog Beanie
Hello All! I started a new project last night for my nephew's 2nd birthday present... a frog beanie!
 He loves "ogs" (as he calls them) and dressed up as one for Halloween this past year. I found the pattern on a blog I follow on blogger. However, this beanie is only for up to 18-month olds. Well, no big deal, I can fix this!
Here are my modifications:
 He loves "ogs" (as he calls them) and dressed up as one for Halloween this past year. I found the pattern on a blog I follow on blogger. However, this beanie is only for up to 18-month olds. Well, no big deal, I can fix this!
Here are my modifications:
- I took the "shaping the beanie" out to 84 stitches (instead of stopping at 78)
- I also did not follow the earflaps, I crochet them a way I came up with when I made when I crochet a Dino-RAWR earflap beanie
- My braids aren't quite as long as the ones from Janet's blog
- When making the eyes, I crochet through both loops to make the color look more uniform
ENJOY guys!
Sunday, January 27, 2013
Crochet Wine Bottle Cover
One of my best friends moved into the area (YAY) so, of course I am putting together a house warming gift for her. There are many things that I have seen about what you should give: Bread so you'll never go hungry. Candles so you'll always have light through the darkest times. Honey so you'll always enjoy the sweetness of life. Olive Oil so you will be blessed with health and well-being. Salt so there will always be flavor and spice in your life. Wine so you will always have joy and never go thirsty.
Well instead of following this closely, I have decided to make my own version: Wine so you can have a good time (on girls day when we drink wine and watch movies), a wine bottle cover (so nobody knows we are boozing), a basket (to keep the wine--among other things-- in... duh), a wine bottle opener (well we need to open it don't we), and love (since I am crocheting the wine bottle cover and basket for her).
So, let the pattern search begin! The baskets were easy to find (I actually found the pattern a while ago and have been itching to make one of them). But, I was looking and looking and looking and could not find a free crochet pattern for a wine bottle that I liked so, I decided to make one of my own!
Materials:
worsted weight yarn (medium 4), I used 'Loops & Threads Impeccable' in True Grey
5.0mm(H) crochet hook
stitch markers
 white ribbon
scissors
Abbreviations:
magic ring: here is a tutorial for right handed crocheters
sc: single crochet
st: stitch
sts: stitches
sl st: slip stitch
ch: chain
MC: main color
CC: contrasting color
Directions:
Note: this pattern in made in continuous rounds so, use a stitch marker to mark your first stitch (to make my bottom nice and flat, I prefer to sc through both loops in rounds 1-7)
Round 1: 6 sc in magic ring (6sts)
Round 2: 2 sc in all 6 sts (12 sts)
Round 3: [sc in next st, 2 sc in next st] around (18 sts)
Round 4: [sc in next 2 sts, 2sc in next st] around (24 sts)
Round 5: [sc in next 3 sts, 2sc in next st] around (30 sts)
Round 6: [sc in next 4 sts, 2sc in next st] around (36 sts)
Round 7: [sc in next 5 sts, 2sc in next st] around (42 sts)
Round 8: sl st in the first st, (in back loops) sc around (ending in the sl st) (43 sts)
Round 9-46 (my wine bottle took about 37 rows to make it to it's lower neck but yours might be different so, yours could vary in length): sc around (42 sts)
Round 47: [sc in next 3 sts, ch 3] around (42 sts)
Round 48-55: sc around 42 sts)
Round 56: sl st around (42 sts)
F/O and weave in ends.
I then decided that I would make a small heart ornament for the ribbon. I found the pattern relatively easy but, I did modify the pattern--I only completed round 1! After the slip stitch, I chained 11 and slip stitch into the first chain, F/O and weave in the ends! Super cute and super easy!
Please note: Patterns are for personal and charity use only. If you enjoy the pattern, please link to it, but do not copy the pattern to your own website or blog.
Well instead of following this closely, I have decided to make my own version: Wine so you can have a good time (on girls day when we drink wine and watch movies), a wine bottle cover (so nobody knows we are boozing), a basket (to keep the wine--among other things-- in... duh), a wine bottle opener (well we need to open it don't we), and love (since I am crocheting the wine bottle cover and basket for her).
So, let the pattern search begin! The baskets were easy to find (I actually found the pattern a while ago and have been itching to make one of them). But, I was looking and looking and looking and could not find a free crochet pattern for a wine bottle that I liked so, I decided to make one of my own!
Materials:
worsted weight yarn (medium 4), I used 'Loops & Threads Impeccable' in True Grey
5.0mm(H) crochet hook
stitch markers
 white ribbon
scissors
Abbreviations:
magic ring: here is a tutorial for right handed crocheters
sc: single crochet
st: stitch
sts: stitches
sl st: slip stitch
ch: chain
MC: main color
CC: contrasting color
Directions:
Note: this pattern in made in continuous rounds so, use a stitch marker to mark your first stitch (to make my bottom nice and flat, I prefer to sc through both loops in rounds 1-7)
Round 1: 6 sc in magic ring (6sts)
Round 2: 2 sc in all 6 sts (12 sts)
Round 3: [sc in next st, 2 sc in next st] around (18 sts)
Round 4: [sc in next 2 sts, 2sc in next st] around (24 sts)
Round 5: [sc in next 3 sts, 2sc in next st] around (30 sts)
Round 6: [sc in next 4 sts, 2sc in next st] around (36 sts)
Round 7: [sc in next 5 sts, 2sc in next st] around (42 sts)
Round 8: sl st in the first st, (in back loops) sc around (ending in the sl st) (43 sts)
Round 9-46 (my wine bottle took about 37 rows to make it to it's lower neck but yours might be different so, yours could vary in length): sc around (42 sts)
Round 47: [sc in next 3 sts, ch 3] around (42 sts)
Round 48-55: sc around 42 sts)
Round 56: sl st around (42 sts)
F/O and weave in ends.
I then decided that I would make a small heart ornament for the ribbon. I found the pattern relatively easy but, I did modify the pattern--I only completed round 1! After the slip stitch, I chained 11 and slip stitch into the first chain, F/O and weave in the ends! Super cute and super easy!
Please note: Patterns are for personal and charity use only. If you enjoy the pattern, please link to it, but do not copy the pattern to your own website or blog.
Saturday, December 22, 2012
Eagles Striped Ear Warmer
So... My boyfriend, and his mom, are Philadelphia Eagles fans, which means when she asked me to make her an ear warmer, the first thing my boyfriend asked was... "Can you make it Eagles?" Well, Christmas is just around the corner...
He showed me a picture of the beanie he wanted it to look like, and simply asked for the striped pattern around the bottom... Super easy! And you can make it any combination of colors you want!

Materials:
3.75mm hook
grey, Kelly green, and white worsted weight yarn (medium 4), I used 'Loops and Threads' Impeccable brand
yarn needle
scissors
Abbreviations:
sc: single crochet
hdc: half double crochet
dc: double crochet
Directions:
With white, chain 96, turn
Round 1: sc across, change colors to Kelly green for the next row (here's a good tutorial on how to change colors at the end of a row...) (95 sts)
Round 2: ch 1, turn, sc across, change colors to grey for the next row (95 sts)
Round 3: ch 2, turn, hdc across, change colors to Kelly green for the next row (95 sts)
Round 4: ch 1, turn, sc across, change colors to white for the next row (95 sts)
Round 5: ch 2, turn, hdc across, change colors to Kelly green for the next row (95 sts)
Round 6: ch 3, turn, dc across, change colors to white for the next row (95 sts)
Round 7: ch 2, turn, hdc across, change colors to Kelly green for the next row
Round 8: ch 1, turn, sc across, change colors to grey for the next row
Round 9: ch 2, turn, hdc across, change colors to Kelly green for next row
Round 10: ch 1, turn, sc across, change colors to white for next row
Round 11-12: ch 1, turn, sc across
F/O and weave in loose ends
With the color of your choice, whip stitch the two ends together
REALLY easy and simple. Fits a woman's head (approx 21" in diameter). Merry Christmas!
Please note: Patterns are for personal and charity use only. If you enjoy the pattern, please link to it, but do not copy the pattern to your own website or blog.
He showed me a picture of the beanie he wanted it to look like, and simply asked for the striped pattern around the bottom... Super easy! And you can make it any combination of colors you want!
Materials:
3.75mm hook
grey, Kelly green, and white worsted weight yarn (medium 4), I used 'Loops and Threads' Impeccable brand
yarn needle
scissors
Abbreviations:
sc: single crochet
hdc: half double crochet
dc: double crochet
Directions:
With white, chain 96, turn
Round 1: sc across, change colors to Kelly green for the next row (here's a good tutorial on how to change colors at the end of a row...) (95 sts)
Round 2: ch 1, turn, sc across, change colors to grey for the next row (95 sts)
Round 3: ch 2, turn, hdc across, change colors to Kelly green for the next row (95 sts)
Round 4: ch 1, turn, sc across, change colors to white for the next row (95 sts)
Round 5: ch 2, turn, hdc across, change colors to Kelly green for the next row (95 sts)
Round 6: ch 3, turn, dc across, change colors to white for the next row (95 sts)
Round 7: ch 2, turn, hdc across, change colors to Kelly green for the next row
Round 8: ch 1, turn, sc across, change colors to grey for the next row
Round 9: ch 2, turn, hdc across, change colors to Kelly green for next row
Round 10: ch 1, turn, sc across, change colors to white for next row
Round 11-12: ch 1, turn, sc across
F/O and weave in loose ends
With the color of your choice, whip stitch the two ends together
REALLY easy and simple. Fits a woman's head (approx 21" in diameter). Merry Christmas!
Please note: Patterns are for personal and charity use only. If you enjoy the pattern, please link to it, but do not copy the pattern to your own website or blog.
Sunday, December 16, 2012
Pineapple Dishcloth
A while back, I made my aunt some crochet washcloths. Well, she likes to visit Hawaii a lot and has numerous items with pineapples on them. So, I made her a pineapple shaped washcloth for Christmas.
This is the pattern used: http://www.bestfreecrochet.com/2011/12/11/345-friendship-pineapple-greeting-maggie-weldon-maggies-crochet/

This is the pattern used: http://www.bestfreecrochet.com/2011/12/11/345-friendship-pineapple-greeting-maggie-weldon-maggies-crochet/
Thursday, December 13, 2012
Crochet Rose
My boyfriend's niece is 5 and is a girly girl. She loves pink and purple and dresses and flowers (and rocks). So, I have some purple yarn left over from making a scarf and decide that a flower can't take too much yarn right? And I made two! A large rose and a small rose. It was ridiculously easy and took maybe 10 minutes.
 Large Rose:
 Small Rose:

Please note: Patterns are for personal and charity use only. If you enjoy the pattern, please link to it, but do not copy the pattern to your own website or blog.

use a 5.0mm hook
ch 39
work 5 tr in the 3rd chain from hook, sl st in the next st
[work 5 tr in next st, sl st in the next st] until you have completed 6 "pedals"
[work 5 dc in next st, sl st in the next st] until you have completed 5 "pedals"
[work 5 hdc in next st, sl st in the next st] until you have completed 4 "pedals"
[work 5 sc in next st, sl st in the next st] until you have completed 3 "pedals"
F/O and leave approx 12 inches of yarn for assembly
 Small Rose:
use a 3.5mm hook
ch 26
work 5 dc in the 2nd chain from hook, sl st in the next st
[work 5 dc in next st, sl st in the next st] until you have completed 5 "pedals"
[work 5 hdc in next st, sl st in the next st] until you have completed 4 "pedals"
[work 5 sc in next st, sl st in the next st] until you have completed 3 "pedals"
F/O and leave approx 12 inches of yarn for assembly
Assembly:
using a yarn needle, starting with the smal pedals, twist in a circular motion as you stitch it together, morphing it into a rose

ENJOY
Cable Stitch Ear Warmer
I know someone who had brain surgery earlier this year causing them to be unable to wear hats. I was looking for a way that I could make a cute ear warmer for her and came across the pattern for the Cable Stitch "Jenna" Headband ... I modified the start/end slightly.

In the beginning I:
ch3, turn
hdc across, increasing the number of stitches in each row's iteration until you get to 13 hdc... then begin the pattern
In the end: I decreased the hdc in the outsides, until it was 1 hdc on each side of the fptr. Then I sc around the edges, and F/O my end.


In the beginning I:
ch3, turn
hdc across, increasing the number of stitches in each row's iteration until you get to 13 hdc... then begin the pattern
In the end: I decreased the hdc in the outsides, until it was 1 hdc on each side of the fptr. Then I sc around the edges, and F/O my end.
Thanks so much for the pattern, Melissa!
Enjoy everyone!
Wednesday, December 12, 2012
Child's Dino-RAWR Earflap Beanie
I made owl baby booties for my cousins new born as a Christmas present. So, I had to find something I could make or her 3 year old. I get to thinking and a hat cant be too hard, right? Wrong! I couldn't seem to find a nice looking pattern for a kid (with a large dome piece). As I'm reading other patterns, I pick up on a similarity with all of them so, it can't be too hard to make my own pattern.
I realize, I cant just make him a hat. I mean, I made his brother's gift look like owls... Good thing I knew he was a dinosaur for Halloween and loved it... So, here is the pattern to the hat shown below:

I realize, I cant just make him a hat. I mean, I made his brother's gift look like owls... Good thing I knew he was a dinosaur for Halloween and loved it... So, here is the pattern to the hat shown below:

Size:
4-9 year old child (19"-20" circumference)
Materials:
5.0 mm hook
stitch marker (I don't have one so, I use a bobby pin instead)
worsted weight yarn: brown and green
Abbreviations:
hdc: half double crochet
magic ring: here is a tutorial for right handed crocheters
sts: stitches
sc: single crochet
sl st: slip stitch
MC: main color
CC: contrasting color
Notes:
this beanie is made in a continuous circle (which is why I used the bobby pin to mark the first stitch in my circle)
Beanie:
Row 1: 7 hdc in magic ring (7 sts)
Row 2: 2 hdc in all 7 sts (14 sts)
Row 3: [hcd in next st, 2 hdc in next st] around (21 sts)
Row 4: [hcd in next 2 sts, 2 hdc in next st] around (28 sts)
Row 5: [hcd in next 3 sts, 2 hdc in next st] around (35 sts)
Row 6: [hcd in next 4 sts, 2 hdc in next st] around (42 sts)
Row 7: [hcd in next 5 sts, 2 hdc in next st] around (49 sts)
Row 8: [hcd in next 6 sts, 2 hdc in next st] around (56 sts)
Row 9: [hcd in next 7 sts, 2 hdc in next st] around (63 sts)
Row 10: [hcd in next 8 st, 2 hdc in next st] around (70 sts) -- at this point my hat was 7" in diameter
Row 11-16: hdc in every st around (70 sts)
Row 17: hdc in the next 69 sts, sl st in the last st (70 sts)
(leave the yarn in it's place and we will now begin the earflaps)
Ear Flaps:
Row 1: ch 1, hdc in next 12 sts, ch 1, turn (12 sts)
Row 2: (back loops) sc2tog, sc next 8 sts, sc2tog, ch 1, turn (10 sts)
Row 3: sc across, ch 1, turn (10 sts)
Row 4: (back loops) sc2tog, sc next 6 sts, sc2tog, ch 1, turn (8 sts)
Row 5: sc across, ch 1, turn (8 sts)
Row 6: (back loops) sc2tog, sc next 4 sts, sc2tog, ch 1, turn (6 sts)
Row 7: sc across, ch 1, turn (6 sts)
Row 8: (back loops) sc2tog, sc next 2 sts, sc2tog, ch 1, turn (4 sts)
Row 9: sc across, ch 1, turn (4 sts)
Row 10: (back loops) sc2tog, sc2tog, ch 1, turn (2 sts)
Row 11: sc across (2 sts)
ch 1, sc around the edge of the hat until you reach the point on the other side where you wish to start the second ear flap and repeat Rows 1-11
Once you have completed the ear flaps, sc around the hat with your MC
Attach your CC and sc around the entire hat, fasten off your yarn and fold in the ends
For the spikes I used a free pattern I found. They are from a blog called Tots and Bottoms and the spikes are from her Stegosaurus Dinosaur Hat (and make sure you leave at least a foot of yarn on the spikes after you fasten them off)
Once I had all of the spikes made, I laid my hat flat and placed the spikes where they are supposed to go. I used a whip stitch to secure them to the top of the hat. Fasten off the end of the yarn once you have finished the whip stitch.
Enjoy!
Please note: Patterns are for personal and charity use only. If you enjoy the pattern, please link to it, but do not copy the pattern to your own website or blog.
Saturday, December 8, 2012
Crochet Chunky Infinity Scarf
I was searching and searching for a simple scarf pattern I could make for someone for Christmas. I know that I want to use a 9.0 mm hook so that it goes quick and I purchased thicker wool yarn to make it with. Well as I'm googling, searching for a good pattern to make, I come across a blog called "Fiber Flux" and I fell in LOVE with an infinity scarf pattern under her Free Crochet Patterns tab. It is called the Pavement Infinity Scarf. However, I make it through the foundation row and realize that in row 1, I can't tell where my "chain 1 spaces from the previous row" are... I guess I just haven't been doing this long enough yet. So, I decide I'll do something that I know how to do and just use the Pavement Infinity Scarf for inspiration. (Note: someone else may have written a pattern similar or exactly like this one but, I didn't use any other pattern besides the Pavement Infinity Scarf for inspiration)
.jpeg) I hope that you enjoy it!
I hope that you enjoy it!
Materials:
N (9.0 mm) crochet hook
Super bulky (weight 6) thick yarn (approximately 200 yards) -- I used Loops and Threads Cozy Wool in clematis
Abbreviations:
hdc: half double crochet
sc: single crochet
dc: double crochet
sts: stitches
ch: chain
sl st: slip stitch
.jpeg) Chain 20
Chain 20
This scarf goes by very quick, it took me approximately 2 hours to complete (and that included writing the pattern).


.jpeg)
Materials:
N (9.0 mm) crochet hook
Super bulky (weight 6) thick yarn (approximately 200 yards) -- I used Loops and Threads Cozy Wool in clematis
Abbreviations:
hdc: half double crochet
sc: single crochet
dc: double crochet
sts: stitches
ch: chain
sl st: slip stitch
Gauge:
approx 6 sts = 2 inches
Instructions:
.jpeg)
Row 1: hdc in the 3rd chain from the hook, hdc across (18 sts)
Row 2: ch 1, turn, sc across (18 sts)
Row 3: ch 3, turn, dc in first st, ch 1, [skip 1 chain and then dc in the next stitch, ch 1] until there are 3 stitches left, skip 1 chain and then dc in the next stitch, dc in the next stitch (18 sts)
Row 4: ch 1, turn, sc across (18 sts)
Row 5: ch 2, turn, hdc across (18 sts)
Row 6: ch 1, turn, sc across (18 sts)
Row 7: ch 3, turn, dc in first st, ch 1, [skip 1 chain and then dc in the next stitch, ch 1] until there are 3 stitches left, skip 1 chain and then dc in the next stitch, dc in the next stitch (18 sts)
Repeat rows 4, 5, 6, 7 (ending with row 7) until the scarf reaches approximately 55 inches.
ch 1, turn, sl st the two ends together all the way across, knot the yarn at the end
weave in the ends of the yarn
attach yarn to the end and sc all the way around the circle, sl st the last st, knot, weave in ends (repeat on the other side of the yarn)
This scarf goes by very quick, it took me approximately 2 hours to complete (and that included writing the pattern).
Please note: Patterns are for personal and charity use only. If you enjoy the pattern, please link to it, but do not copy the pattern to your own website or blog.
Friday, December 7, 2012
Baby Owl Booties
My cousin had a baby boy on October 15th! YAY! Well, I was looking for something cute to make him. I found out that I can actually follow patterns! Well, at my new favorite website, I found a section for "baby items/baby booties" and then I saw a link for Crochet Baby Owl Booties and the pictures were ADORABLE. So, I went to Michaels and bought the supplies needed. Here is the resulting pair:


Thanks so much for sharing the pattern, Janet!
Crochet Dishcloths
So... I've been learning to crochet, right? Well get this... I decide that I can start following patterns. I youtube how to do a lot of the different stitches needed and there I go. My aunt wants some crochet dishcloths (apparently they do a better job than normal ones?) so, I find some patterns from my new favorite website crochet pattern central (this site is amazing for free patterns). I decide that I can make her three different dishcloths that will go with the colors in her kitchen: red, green, and a red/yellow mixture.
The first (and smallest) dishcloth of the three is the green one:
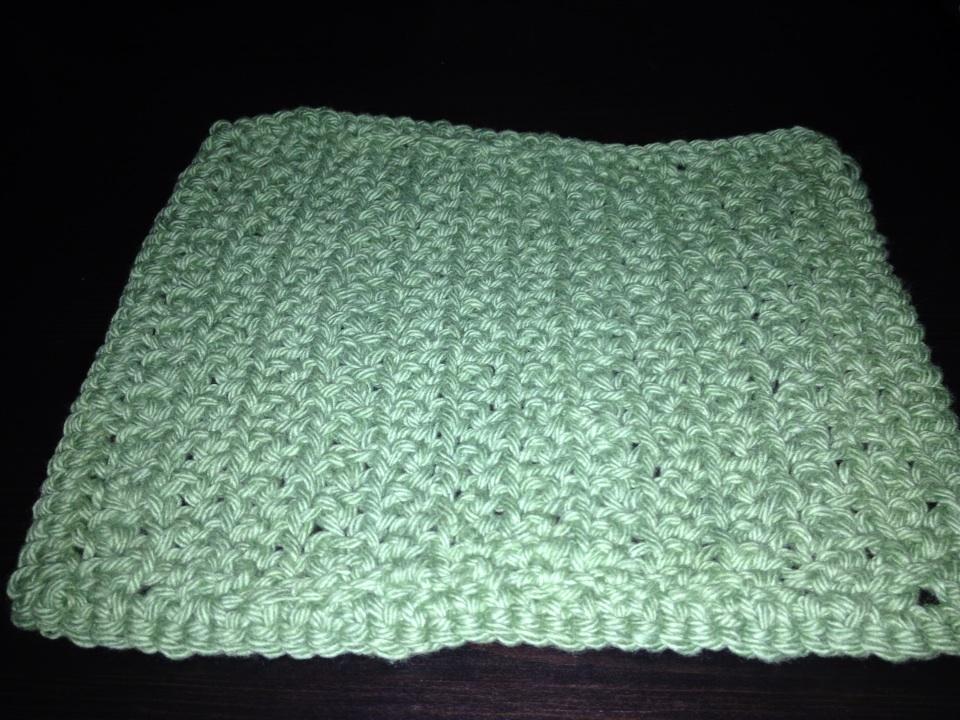 This pattern was labeled as "Plain and Simple" and let me tell you... it wasn't hard, just time consuming. So, I'm getting better and faster at this crochet thing... So dishcloth round 2, here I come!
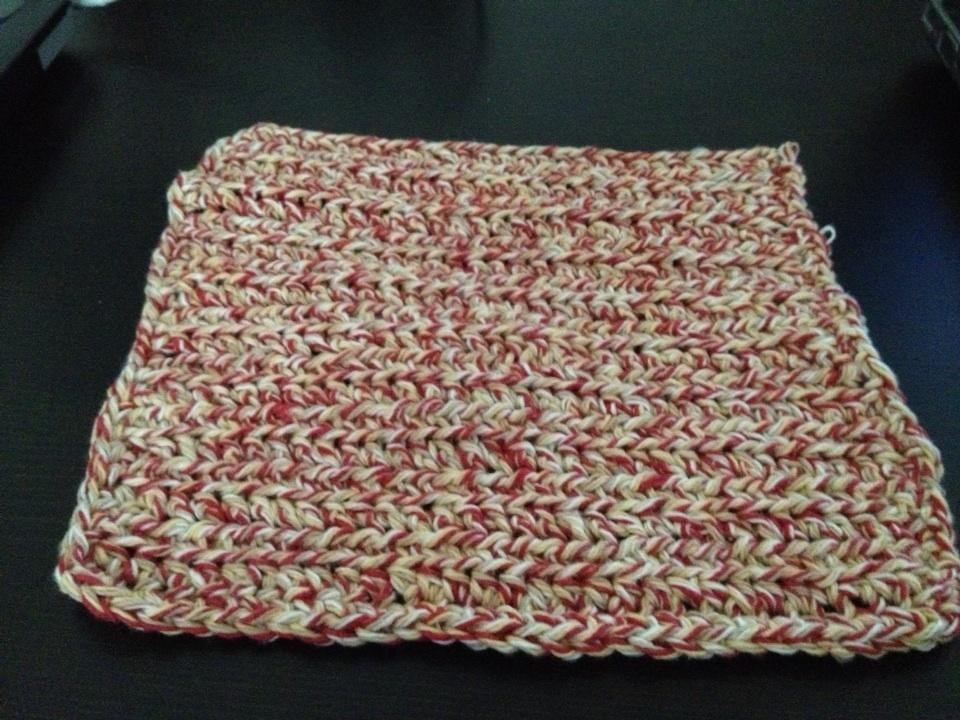 The second (and mid size) dishcloth of the three is the red/yellow mixture:
This pattern was labeled as "Simple and Practical" and it was just that. The first dishcloth took me crocheting (on and off) for a day (probably 3 hours) to finish... the second took maybe 1 1/2 hours. Now I'm prepped and ready for round 3... bring it on!
The third, and final, (and largest) dishcloth is the red one:
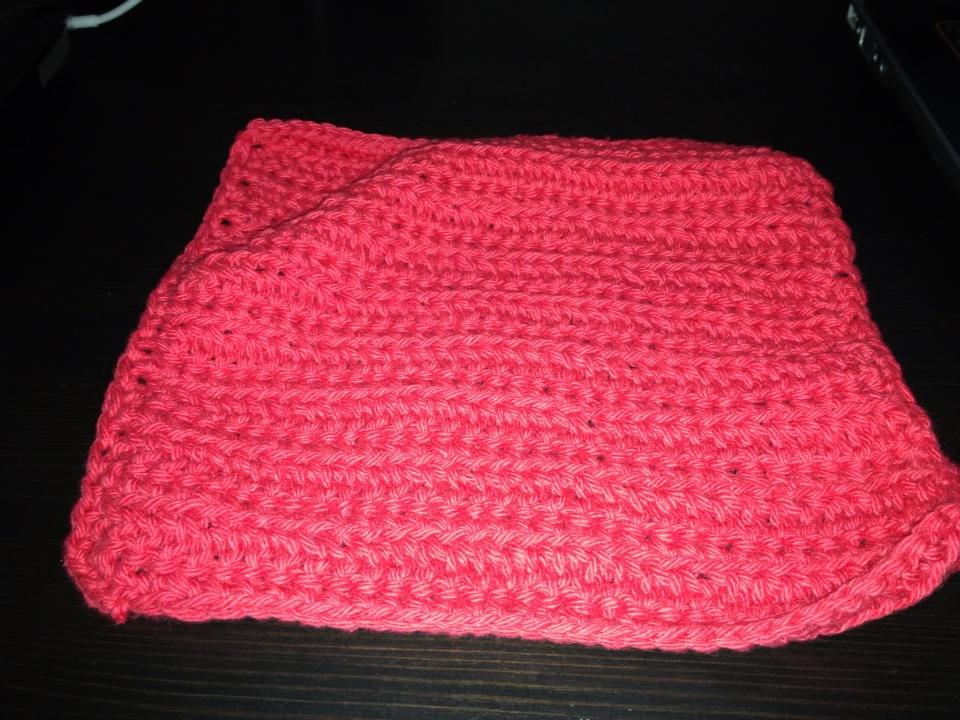 This pattern was VERY easy and took around 30 minutes to finish! (as soon as I find the pattern I used I will post it up here).
Now... Should I make her one more? I will have to buy more yarn but, she does love her pineapples :)
The first (and smallest) dishcloth of the three is the green one:
This pattern was labeled as "Simple and Practical" and it was just that. The first dishcloth took me crocheting (on and off) for a day (probably 3 hours) to finish... the second took maybe 1 1/2 hours. Now I'm prepped and ready for round 3... bring it on!
The third, and final, (and largest) dishcloth is the red one:
Now... Should I make her one more? I will have to buy more yarn but, she does love her pineapples :)
Thursday, December 6, 2012
Crocheting... Let the FUN begin

Subscribe to:
Posts (Atom)